Install file manager plugin for TinyMCE
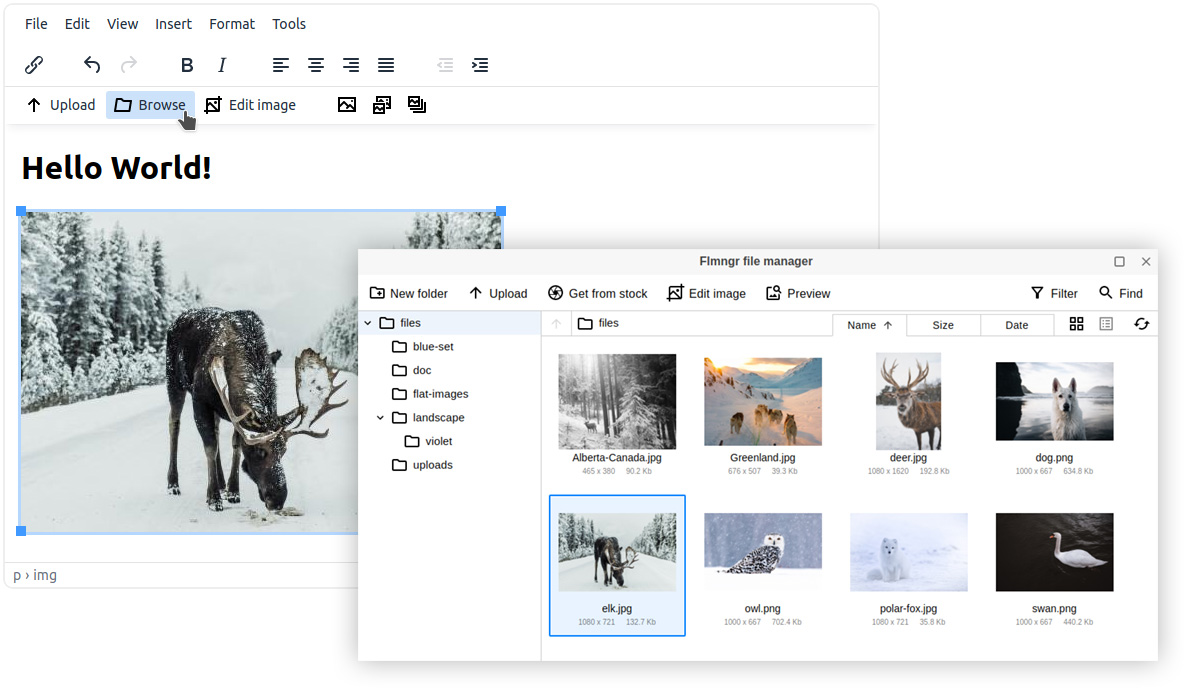
The TinyMCE file manager plugin ships with these key features:
- Insert images
- Insert small interactive previews
- Insert image galleries
- Reference files in links or buttons
- Image editor
- Support for your current storage
Download
Get the file manager plugin for your TinyMCE 8 (v. 7, 6, 5 and 4 are also supported):
Download pluginGet Ready-to-Use build
TinyMCE 8 + file manager plugin pre-installed.
Zero configuration is required. Sample included.
Skip next installation steps.
Use as an instant preview or copy it into your project.
Only link to your storage when you are ready.
Enable
Find the place in your HTML/JavaScript code where you load TinyMCE and enable the file manager add-on in the initialization parameters:
tinymce.init({
    plugins: "file-manager,image,link",
    Flmngr: {
        apiKey: "FLMN24RR1234123412341234",
    }
    // Toolbar is configured automatically
    // Your API key and all configuration:
    //   https://flmngr.com/dashboard
});Install the backend
Now you need to install the file manager server-side script somewhere on your server. There is a manual behind the link on how to do it and link the backend with the Flmngr TinyMCE plugin.
Ready to use
Customize
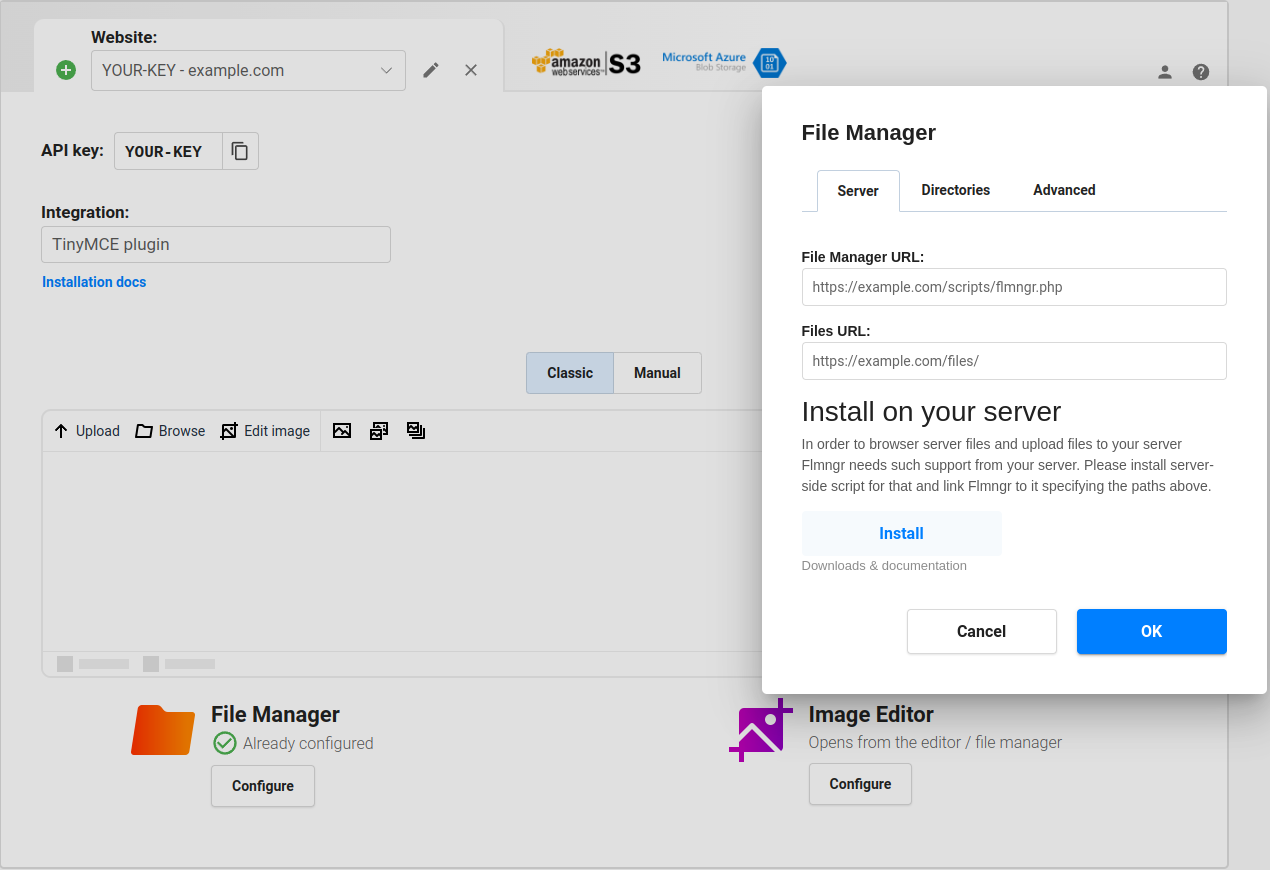
We recommend you to register a free own API key to configure Flmngr visually using Dashboard. Or you can configure it by passing API parameters directly. There is also a short FAQ related to TinyMCE plugin.
Samples
Here are the samples of TinyMCE with the file manager installation and using its API:

API
If you need to use Flmngr outside of TinyMCE on the same page, you can get its object and call it from JavaScript to ask it to pick files, upload an image, etc.
Use from API